Reference Book: Star Wars Saga Edition Rebellion Era Campaign Guide
Affiliation Page: The Rebel Alliance
The Rebel Alliance is a ray of hope in the blackness of The Dark Times. Outmanned and outgunned, the fighters of the Alliance risk their lives in the effort to free the galaxy from Emperor Palpatine's iron grip. Some Rebels fight for their homeworlds, some fight for their families, and some fight for ideals, but all fight the evils of tyranny. In many ways, The Rebel Alliance defines the Star Wars universe. It represents the ultimate battle between good and evil, light and dark.
A Brief History of the Rebellion[]
The following covers the major events leading up to the state of the Rebellion during The Rebellion Era, and should make it easier to understand the current state of The Rebel Alliance.
Early Resistance[]
Dark Times uprisings are small and restricted to specific planets or regions. Although they might be temporarily successful, none of these uprisings comes close to challenging the vast military power of the Empire. Victories are difficult to achieve, and few make a lasting impact on the galaxy.
Behind the scenes, a few powerful Imperial Senators have struggled for decades in a battle against oppressive Imperial edicts. However, cooperation is limited by the fear of detection and the ignorance of others' activities. Two Senators, Bail Organa of Alderaan and Mon Mothma of Chandrila, secretly discuss organized resistance in Organa's Cantham House residence on Coruscant. Later, veteran Senator Garm Bel Iblis of Corellia becomes involved as he begins to fear that the New Order is causing Corellia to lose its distinctive identity. As The Dark Times give way to The Rebellion Era, pockets of resistance around the galaxy become locally organized. However, they are unable to coordinate with other like-minded groups and lack the communications and support structure needed for sustained operations.
Unleashed Rebellion[]
Two years before the Battle of Yavin, several major resistance units become active enough to force Organa, Mothma, and Bel Iblis to advance their plans for armed rebellion. By now, Mothma is on the run from Imperial authorities, after the Emperor's arrest order forces her to flee Coruscant. Bel Iblis goes into hiding following an Imperial assassination attempt that leaves the galaxy believing him to be dead. Bel Iblis and Mothma work from behind the scenes, recruiting others across the galaxy to their cause. Organa remains in the Imperial Senate, although his influence is greatly diminished since those loyal to the New Order refuse to support a Senator suspected of treasonous activities.
Into this growing resistance movement suddenly appears a being strong in The Force, who calls himself Starkiller. He quickly proves worthy of trust by saving Senator Bail Organa from the wilds of Felucia. He also hinders the Empire's Wookiee slave operation on Kashyyyk at the behest of Princess Leia Organa, who has been ordered to oversee the construction of the operation by the Emperor as a form of punishment for her rebellious ways. Starkiller's considerable ability with The Force leads Bail Organa and his allies to believe that he might be capable of succeeding.
After conferring once again in a risky meeting at Cantham House, Organa, Bel Iblis, and Mon Mothma arrange to formalize the "Alliance to Restore the Republic" on Corellia. The three main conspirators attend, along with a holographic link with Princess Leia. Starkiller and his pilot, Juno Eclipse, soon follow. Just as the meeting starts, Imperial forces led by Darth Vader spring their trap. Bail Organa's quick order to sever the holographic link prevents the discovery of Leia's direct participation, but the three conspirators are immediately captured. Vader exposes Starkiller as his would-be apprentice, then devastates the youth by revealing that the Sith Lords had manipulated Starkiller's entire life for this moment. Vader then tries to dispose of his now useless apprentice.
Starkiller survives. Determined to destroy Darth Vader and the Emperor's plans, he pursues the Sith Lords to the Death Star construction site. Both Vader and Emperor Palpatine are on hand to witness the execution of the Rebel leaders. Starkiller infiltrates the incomplete battlestation and frees the conspirators, but at the cost of his own life.
After a narrow escape, Organa, Mothma, and Bel Iblis go to Kashyyyk to confirm what they have learned of Starkiller's origins. Inspired by his sacrifice, they resolve to use his family crest as the symbol of their new Rebel Alliance, and finally formalize its creation and operational standards in the Corellian Treaty.
After his exposure to Darth Vader and the Emperor as a leader of the resistance, Bail Organa resigns from the Imperial Senate and returns to the protection of his position as Viceroy and First Chairman of the Alderaan System. His daughter, Leia, replaces him in the Senate, although her loyalty is suspect. Mothma becomes head of the Alliance, while Bel Iblis returns to command his militia forces in and around Corellia.
Mon Mothma releases a Declaration of Rebellion, publicly announcing the political ideology behind the Rebellion in an effort to forestall Imperial propagandists. A few systems openly declare their allegiance to the new Alliance well before any sizeable defense force can be mustered. Imperial responses quickly crushes these Secession Worlds, but not before significant resources, weaponry, ships, and manpower are delivered directly to freedom fighters and The Rebel Alliance.
The Battle of Yavin[]
For about two years, the growing Rebel Alliance fights for public support as much as it battles the Empire. Resistance efforts and recruitment spread slowly from sector to sector. The actual number of forces remains tiny compared to the mighty Empire, and the Alliance scores only one major victory against Imperial forces.
All this changes with the arrival of The Millennium Falcon at the main Rebel base on Yavin 4. A rescued Princess Leia and the plans to the newly operational Death Star give the Rebels the means and, with the Death Star's rapid approach, an immediate need to destroy the Emperor's monstrous superweapon. An ultimate weapon of terror, The Death Star is capable of annihilating entire worlds with a single shot of its superlaser, as is demonstrated by the destruction of Alderaan.
Fortunately for the Alliance, The Millennium Falcon also brings future Jedi Luke Skywalker at the time of the Rebels' greatest need. When Rebel Starfighters make a desperate attack against the station, Luke joins them. After more experienced pilots fail to hit the station's vulnerable exhaust port, Luke makes the shot that shakes the galaxy and the Empire. In one cataclysmic explosion, The Death Star is gone.
The Rebel Alliance scores a major victory, although it is forced to flee Yavin 4 and spend much of the next several years on the run. This tremendous victory brings new allies, raw recruits as well as high officials on sympathetic worlds. Entire resistance groups are integrated into the Alliance's command structure, and new cells are created on even the most loyal of Imperial worlds.
Imperial Pursuit[]
However, the Empire is far from beaten and aggressively pursues the Rebels. Darth Vader leads the effort to seek out and destroy Rebel forces. The Imperial Security Bureau and the Commission for the Preservation of the New Order (COMPNOR) hunt down and arrest civilian Rebel sympathizers. Imperial response is brutal against the general public in areas where Rebel groups are active. Supporting the Rebellion is dangerous, and the Empire makes sure the galaxy knows it.
After years of relentless pursuit, Imperial forces locate the Alliance's new main base on the icy world of Hoth. The Imperials attack immediately, forcing the Rebels to flee once again. During this time, Luke Skywalker receives critical Jedi training from Jedi Master Yoda. All is nearly lost when the young Jedi is drawn into a trap and forced to battle Darth Vader on Cloud City in an effort to save his friends from capture.
Over the next few months, a series of events occur, ultimately leading to the Battle of Endor. Among these are the death of Black Sun head Prince Xizor, which disrupts the criminal syndicate and delivers information the Rebellion needs in order to locate and attack the second Death Star, still under construction. The Hutt Kajidics also suffer a major blow when Princess Leia kills Jabba the Hutt while the heroes of Yavin rescue Han Solo from the crime lord.
The Battle of Endor[]
The Battle of Endor, quite simply, is an Imperial trap gone horribly wrong. It is an effort to draw out the main Rebel fleet and destroy it with the Imperial fleet and the secretly operational second Death Star. The Rebels cannot pass up an opportunity to destroy the station and the Emperor in a single blow. However, the Emperor fails to account for the resourcefulness and resiliency of the Rebellion's heroes- and a vast number of unexpected Ewok allies. In an immense planetary and space battle, the Rebels destroy the station. Luke Skywalker manages to turn his father, Darth Vader, back from The Dark Side, but Vader is killed by injuries sustained when he throws the Emperor to his death.
Dawn of the New Republic[]
News of the Emperor's death races through the Empire. Mere days after the Battle of Endor, The Rebel Alliance becomes the Alliance of Free Planets and negotiates the creation of a new government as influential systems and sectors openly defect from the Empire. A month later, Mon Mothma creates the New Republic Provisional Council and publicly announces a "Declaration of a New Republic" signed by top Alliance leaders and officials from the most powerful breakaway systems. With Mon Mothma as Chief Councilor- and later, Chief of State- the fledgling New Republic government continues to evolve as its influence spreads through the galaxy. Rebel Alliance military units transition into similar roles in the expanding New Republic forces.
Within the Empire, rival factions vie for power. Some attempt to claim the Imperial throne, while others, especially Moffs and high-ranking military officials, quickly consolidate power within their own personal kingdoms. These warlords and political opportunists further weaken the Empire, allowing The New Republic time to consolidate its holdings. Additional systems decide to join the new government, often without military confrontations. Still, powerful Imperial forces hold out for years before The New Republic reclaims the galaxy's major worlds from Imperial rule.
Organization[]
The Corellian Treaty establishes an organizational structure for the Alliance to Restore the Republic similar to that of a large-scale government. There are two main organizations acting in concert to bring about the fall of the Empire: the Civil Government and the Alliance Military. Both are led by the Chief of State, a position held by Mon Mothma throughout the history of The Rebel Alliance
Civil Government[]
The Civil Government provides basic leadership and common government functions such as protection, taxation, and diplomatic relations. In practice, these functions fall to the control of local authorities and members governments of allied worlds and organizations. The Civil Government handles political functions between members, potential members, and the galaxy at large. However, the primary purpose of the Civil Government is to support the Alliance Military.
The Chief of State heads the Civil Government and is essentially an elected dictator with full autocratic power over the Alliance. Elections are held every two years among member governments, and the position is automatically terminated with the fall of the Emperor. The Chief of State is the Alliance's ultimate negotiator, diplomat, and arbiter.
The Advisory Council serves as a balance to the power of the Chief of State. The Council is made up of representatives from the seven allied governments that have given the most lives in battle against the Emperor; which seven governments meet that criteria changes over time. They have the power to approve or disapprove the actions of the Chief of State, as well as remove her if they disapprove of her conduct. They also serve as a moral compass. They have no direct control over the Cabinet or Ministers.
The Cabinet is the primary leadership structure that runs the Alliance, carrying out the Chief of State's policy decisions. The Secretary of the Cabinet organizes the meetings and maintains operations when the Chief of State is unavailable. The Cabinet is made up of six Ministries, each under the charge of its own Minister.
- Finance Ministry: The Finance Ministry oversees Alliance income and expenditures, including those of the massive war effort. It establishes various financial structures to receive credits from overt and covert member states in the form of bonds, taxes, or other financial schemes. It also prints the Alliance Credit, though as a currency it is of limited value outside the Alliance until after the Battle of Endor.
- Education Ministry: The Education Ministry provides intelligence services to the Civil Government, though it works closely with the larger and more effective Alliance Intelligence. It is also in charge of propaganda and promoting the true nature of the Alliance throughout the galaxy.
- Ministry of State: The Ministry of State oversees the Diplomatic Corps and directs relations with nonmember governments. The Minister of State would also serve as the interim Chief of State, if anything were to happen to Mon Mothma. The Ministry of State is always looking to recruit able diplomats to negotiate with member worlds, potential members, and other organizations outside the Alliance.
- Ministry of Industry: The Ministry of Industry oversees the Alliance's few, overworked industrial manufacturing facilities, which include a few factories on hidden Alliance safe worlds plus a few on sympathetic worlds such as Mon Calamari. The Ministry also negotiates covert deals with manufacturers secretly sympathetic to the Rebellion.
- Supply Ministry: The Supply Ministry obtains the massive amount of supplies needed to keep the Alliance Military operational. Material is obtained in any manner possible, since the Alliance's limited funds make purchasing everything on the open market a near impossibility. Food comes from Alliance safe worlds. Supplies are limited by the transport available. The Supply Ministry is always looking for good, cheap, and determined pilots to run food and supplies to far-flung Alliance bases and isolated resistance groups.
- Ministry of War: The Ministry of War directs Alliance Military forces. Its Minister devises specific military strategies but leaves operational control to the specific military commanders and Chiefs of Staff. The Minister also coordinates between the Alliance Military and other Ministries.
Alliance Military[]
The Alliance Military forms the heart of The Rebel Alliance. Its objective is to defeat the Imperial Army and Navy and bring about the fall of the Emperor. Although its forces are limited and vastly outnumbered, they are highly motivated and undaunted by the massive task.
Alliance High Command orders and oversees all Alliance Military efforts. It operates abroad the Alliance Fleet, but moves to the main Rebel base if needed. High Command reports to the Commander in Chief, Mon Mothma, and is composed of the Supreme Allied Commanders. The Supreme Allied Commanders oversee their own departmental commands and coordinate with the Cabinet as needed.
Fleet Command represents the most important Alliance asset, the main Rebel Fleet. Admiral Ackbar holds the position of Fleet Commander for much of the Rebellion's existence.
Ordnance and Supply obtains difficult-to-acquire ships, equipment, weaponry, and other supplies for the Alliance Military. This command coordinates heavily with the Supply Ministry. Transport of material falls to Support Services.
Starfighter Command oversees the Alliance's extensive Starfighter fleet. It trains pilots and assigns wings to Fleet Command and Sector Command and provides operational orders for wings without permanent assignments, such as Rogue Squadron. Starfighter Command can find itself at odds with Sector Command when scarce Starfighter Wings are pulled away from sector defense to cover operational duties.
Support Services provides the heavy lifting for the Alliance's transportation and support network. It controls freight and passenger transportation and provides specialized personnel such as doctors, mechanics, technicians, cooks, maintenance crews, Droids, and other support staff. It maintains and supports Alliance bases and safe worlds.
Alliance Intelligence provides detailed information on Imperial military forces and related civilian efforts such as COMPNOR. The Chief of Intelligence provides the accumulated information and analysis to the Supreme Commanders and reports to the Commander in Chief daily. With operatives spread throughout the galaxy, Alliance Intelligence agents make up a large percentage of active Alliance personnel.
Special Forces Command oversees the approximately ten divisions of Alliance Special Forces units. They work directly for and protect Alliance High Command. They serve aboard fleet vessels, carry out critical and specialized raids, and are provided to individual Sector Commands when needed. General Crix Madine is the best-known commander of Special Forces.
Sector Command oversees and provides strategic orders and advice to the thousands of individual Sector Forces spread throughout the galaxy. Sector Command does not attempt to micromanage the Sector Forces, but instead concentrates on coordinating them with Alliance forces in critical operations. It also organizes new Sector Forces in uncontrolled regions without an Allied Government. Sector Command cannot always move quickly, given the vast distances and communications difficulties involved, but it can set up individual Command Groups with limited autonomy for emergency situations. Finally, the majority of regular Alliance troops fall under the auspices of the various Sector Forces.
Allied Commands, collectively, are the individual Allied Governments (Planetary, regional, or otherwise) and military Sector Force Commands (When no Allied Government exists). These Allied Commands report to and coordinate with Alliance High Command, though they also exercise semiautonomous control over their own regions. They can also coordinate with a local Sector Force, if they do not join it outright. Nominally, these Allied Commands have structures identical to the Alliance's political structure and ministries, but in practice these Allied Governments retain their own governments and command organizations.
Alliance Military Ranks[]
Alliance Military Ranks are primarily divided between Army and Navy ranks, with variation within SpecForce and Starfighter Command. Compared with the galaxy's major military forces, the Alliance features fewer formal officer and enlisted personnel ranks. The simplified structure allows for more leeway in integrating newly recruited combat forces into the Alliance military command organization. It also discourages Alliance personnel from worrying too much about their career rank, especially since the Alliance expects the military to be dissolved or substantially reorganized upon victory over the Empire.
Local commanding officers are expected to clarify any ambiguities in their own chain of command and sometimes create unofficial or temporary designations; occasionally, a newly recruited organization retains its own rank structure. Additionally, as the Alliance frequently deploys units with mixed forces, command hierarchies between specific officers of equivalent rank but from different branches are established in the planning stages of a mission. Temporary or role-specific titles can be utilized within a given unit, base, or task force. The title of "Commander" is used to designate the commanding officer of a given unit or mission, despite the actual rank of the individual.
| NAVY | ARMY | SPECFORCE | STARFIGHTER COMMAND |
|---|---|---|---|
| Admiral | General | General | General |
| Captain | Colonel | Colonel | Colonel (Wing Commander) |
| Commander | Major | Major | Commander |
| Lieutenant Commander | Captain | Captain | Captain |
| Lieutenant | Lieutenant Commander | Senior Lieutenant | Lieutenant |
| Ensign | Lieutenant | Lieutenant | Flight Officer |
| Chief Petty Officer | Sergeant Major | Master Sergeant | - |
| Petty Officer | Sergeant | Sergeant | - |
| Senior Deckman | Senior Trooper | Senior (1st) Trooper | - |
| Deckman | Trooper | Trooper | Flight Cadet |
The Alliance Fleet[]
The Alliance Fleet is the single greatest military asset in The Rebel Alliance. It represents Rebel strength and mobility, and it is a powerful strike force capable of decisive military victories. Admiral Ackbar is the commander of the fleet throughout much of the Galactic Civil War. Even though the fleet is both a powerful symbol and a critical weapon against the Empire, Ackbar knows that he must pick and choose his battles carefully. A significant defeat would mean the loss of critically needed ships and personnel, not to mention the incalculable damage to the Alliance's public image.
So important is the fleet that Mon Mothma expressly forbids Ackbar from engaging the Imperials in a formal, large-scale battle. She believes the Alliance can survive the loss of either its main base or its fleet, but not both. Throughout most of the Galactic Civil War, the Alliance lacks the resources to replace lost Capital Ships. However, Ackbar is encouraged to detach up to one-quarter of his fleet for raids and specialized missions, and he rotates this detachment regularly. Even though the entire detachment might take part in the same mission, it is usually divided into separate strikes in support of various Sector Forces or as directed by Alliance High Command.
Unlike the Imperial Fleet, the Alliance Fleet is not standardized with specific ship models or designs. As will all other material, the Alliance gathers Capital Ships from wherever it can acquire them. This sometimes takes the form of the defection of a ship and crew to the Rebel cause. Although the core of the fleet is made up of Mon Calamari Star Cruisers, no two are exactly alike, given the Mon Cal preference of treating their vessels as works of art. The Rebels have also become experts at refitting old Imperial Dreadnaught-Class Heavy Cruisers into Rebel Assault Frigates Mk I and Rebel Assault Frigates Mk II, but they, too, are slow to become available in large numbers. The fleet does standardize specific Starfighters, in conjunction with Starfighter Command.
The fleet relies on close-support corvettes, frigates, gunships, and similarly sized vessels to provide antistarfighter screens for the big cruisers. The greater agility of these craft also makes them ideal for quickly maneuvering to outflank an opponent. Alliance task forces are built around ships of this size, occasionally backed up by a MC80 Star Cruiser.
Armed and armored freighters back up Starfighters in picket and patrol duties. These freighters are by far the least suited for their new military roles. Though they are heavily modified with upgraded shields and weaponry, in a straight battle, their longevity depends more on the determination of their crews than on their specs.
Fleet Command[]
Internally, Fleet Command consists of the Admiral of the Fleet, who oversees the line admirals, Starfighter Command, Fleet Intelligence, and Ordnance and Supply. Beyond the rank organization (See Alliance Military Ranks, above), Fleet Command also includes departments that might or might not be within the actual chain of command. Specialist positions, such as medical officers, deck officers, engineering personnel, and gunnery crews, report to their own department heads as well as to bridge officers. Starfighter pilots attached to the fleet report directly to ship captains or admirals, but not to Starfighter Command, for the duration of the tour. The same typically holds true for Special Operations and SpecForce personnel attached to the fleet.
Fleet Detachments[]
In keeping with the loose organization encouraged throughout the Alliance, subdivisions of the fleet are made on an interim and ad hoc basis. The fleet, its detachments, and semiautonomous groups are under the direct control of an Allied Command or Sector Force.
- Element (1 Vessel): A single Starship is known as an Element, commanded by the ship's captain.
- Section (3-12 Vessels): A small number of Starships is called a Section. A Section's role determines its exact number. Heavy cruisers are not commonly available, and if they are included, number only 1-3. More often, the Alliance deploys a variety of 3-8 corvettes, frigates, or similar light Capital Ships. If both Capital Ships and close-support vessels are included, the group is called a Flotilla. The most senior ship's captain in the Section acts as its commander, unless otherwise directed by the fleet or Alliance High Command.
- Squadron (12-36 Vessels; plus support units): A Squadron consists of 3-4 complementary Sections, such as a line of Capital Ships supported by a Section of escort ships and a Flotilla of armored freighters acting as a picket line. Fleet detachments are commonly of this size and number. Squadrons are commanded by a senior captain or admiral (Sometimes called a line admiral), as directed by the fleet or Alliance High Command. Allied Commands that retain the traditional commodore rank grant that position to Squadron commanders.
- Battle Group (48-72 Vessels; plus support units): A Battle Group consists of 2-4 Squadrons. Rarely does the fleet form such a large single detachment, so Battle Groups operate under the command of the largest Allied Commands. A Battle Group is commanded by an admiral, called a line admiral.
- Fleet (100 or more Vessels; plus support units): A Fleet consists of 3-6 Battle Groups, led by a fleet admiral, or the Admiral of the Fleet (Admiral Ackbar for most of the Galactic Civil War) when speaking of the main Alliance Fleet.
Starfighter Command[]
Starfighter Command controls strategic deployment and development of Alliance Starfighter forces. It carries out pilot training and wing assignments to the fleet, Sector Forces, and other commands. It issues operational orders to those wings not permanently assigned to the fleet or specific sectors. Once a wing is assigned to a fleet or sector, Starfighter Command relinquishes operational control until the unit is needed elsewhere.
Since the fleet is forbidden from engaging Imperial forces in large-scale battles, raids and skirmishes are carried out by Starfighters. A huge percentage of Alliance resources is dedicated to Starfighter services. Alliance forces at all levels rely heavily on Starfighter support and fight vigorously to hold onto it when it is available to them. Some Starfighter Squadrons operate from their own dedicated bases. However, in most cases, Starfighter Squadrons rely on the commands to which they are attached for supplies and support.
Starfighter Wings[]
Whether attached to a cruiser, carrier, sector base, or dedicated facility, Starfighter Wings have the same basic organization. The smallest unit assigned to a specific command is typically the Squadron. A Wing is typically scattered among several ships or bases of the command to which it is assigned.
- Eelement (2 Starfighters): The Element is the smallest tactical unit in a Wing. It consists of a leader and a wingman.
- Flight (2 Elements): A Flight consists of four Starfighters, led by a flight commander, the most senior of the Flight's pilots (A lieutenant or captain).
- Squadron (3 Flights): A Squadron is made up of 12 Starfighters, led by the squadron commander. Each Squadron contains only one type of Starfighter, which might dictate the Squadron's role in battle. A Squadron has a name or color designation and may informally be referred to as a Group.
- Wing (3 Squadrons): A Wing consists of 36 Starfighters plus all necessary support personnel, craft, and equipment. A Wing is normally made up of three Squadrons, one of which is a Recon Squadron. Each Squadron within a Wing can use a different fighter type, so A-Wings, X-Wings, and Y-Wings are commonly deployed in the same Wing. Wings are led by a colonel, called the wing commander, although an officer of lesser rank holding the position also uses the title of wing commander. The wing commander reports directly to the local commander, either a Sector Force officer or a ship's captain. When assigned to the fleet, a Wing also reports to the fleet's Starfighter Command.
- Group (2 or more Wings): Formally, a Group contains two or more Wings. In Starfighter Command, the Group is rarely used; smaller deployments of Wings or Squadrons are more common. In rare battles where large numbers of Starfighters are deployed, a Group is led by the most senior wing commander or by a general.
Using the Alliance Fleet[]
The Alliance Fleet is a powerful symbol in any campaign. The main fleet should not engage large-scale Imperial forces directly unless your campaign is re-creating the Battles of Scarif or Endor, but there are plenty of other opportunities to use the fleet. First, the fleet makes an excellent base of operations for the heroes, providing safety from the Empire and giving the heroes access to virtually all Alliance resources. If the heroes are Special Operations units, Starfighter pilots, or crew members aboard one of the larger Starships, they can participate in missions with fleet detachments, raids, or task forces, which could take them to virtually any sector in the galaxy.
The fleet does not seek to engage the Imperials, but the Imperials are still out to find it. Sudden retreats and relocation are common. Heroes could find themselves covering the fleet's retreat, or jumping to its last known location only to find an Imperial patrol or Star Destroyers waiting for stragglers after scaring the Alliance Fleet off. Also, knowledge of the fleet's location and makeup is dangerous. Any captured hero should be extremely nervous about Imperial questioning.
The Alliance Army[]
The Alliance Army is the ground forces of the Alliance Military, consisting of the Alliance SpecForces controlled by Alliance High Command, and various Sector Forces controlled by their respective sector commanders.
Sector Forces[]
Sector Forces are the backbone of the Alliance Army. These are assimilated resistance groups fighting the Empire on their own worlds and in their own sectors. They receive a great deal of autonomy from Alliance High Command, which is usually too far away to respond to day-to-day details. Although Sector Forces control military assets, they must confront the Empire through traditional resistance methods far more often than in direct combat. They receive support, supplies, and material from the Alliance. They also exchange intelligence data and general news with Alliance High Command. Large Sector Forces that have not inherited a command structure use a structure similar to that of Alliance High Command. This includes a Commander in Chief, a Chief of Staff, and commanders leading individual departments such as Intelligence or Starfighter Command.
Independent resistance groups that want to formally join the Rebellion are integrated into the Alliance Military. If there are no active Allied Commands or Sector Forces already in place in the area, the resistance group becomes the core of the new Sector Force. The group is encouraged, but not required, to adopt the Alliance command structure. If another Allied Command or Sector Force is already in place, the group is integrated into the existing command. Alliance High Command will go to great lengths to smooth over any political or personal hostility between rival groups.
Each Sector Force commands all types of units within its organization, including ground troops, Starfighter Squadrons, and sector-based fleets and Starships. They also control standard Alliance army troops, which represent the greatest part of the Alliance's ground strength. If Alliance High Command needs a larger number of regular troops in a given area, it turns to the local Sector Force to provide the manpower.
Sector Command Structure[]
Some Sector Forces retain their own specific army organizations, but most have adopted with Rebellion's system described below, based on the traditional galactic army order of battle. However, the specific number and size of units varies greatly from sector to sector. Sector Forces also use the Fleet Command and Starfighter Command organizations presented above. Ultimately, all units within a specific Sector Force answer to the sector's Commander in Chief or equivalent commanding officer.
- Squad (9 Troopers): The smallest group in the Alliance Army, a Squad is commanded by a sergeant.
- Platoon (36 Troopers): The standard Platoon consists of four Squads led by a lieutenant and a master sergeant.
- Company (144 Troopers; plus support personnel): A Company is formed of four Platoons commanded by a captain.
- Battalion (576 Troopers; plus support personnel): A Battalion consists of four Companies led by a major.
- Regiment (2,304 Troopers; plus support personnel): A Regiment consists of four Battalions led by a colonel (Sometimes called a regimental commander).
- Brigade (9,216 Troopers; plus support personnel): A Brigade consists of four Regiments led by a general or colonel. In some Allied Commands, a Brigade might be referred to as a legion, depending on local military tradition.
- Corps (36,864 Troopers; plus support personnel): A Corps consists of four Brigades commanded by a general.
- Sector Army (Over 100,000 Troopers; plus support personnel): Theoretically, a Sector Army consists of multiple Corps, with the exact number and size determined by the size of the sector's assets. Practically speaking, the number varies considerably, depending on the time frame involved and the strength of Rebellion forces within the sector. By the Battle of Endor, a few sectors might be able to field multiple Corps, while others are lucky to field a Regiment. The Sector Army is commanded by the sector's most senior general, who might also be the Sector Force or Allied Commander. The commanding officer answers to the Alliance High Command Commander in Chief, Mon Mothma, although in practical terms, he or she coordinates with Sector Command for everyday operations.
Using Sector Forces[]
Sector Forces and Allied Commands are ideal for adventures and campaigns confined to a single sector, planet, or region. Gamemasters can create their own military and political leaders for the campaign without running afoul of established continuity. Sector Forces provide support and local leadership for the heroes to interact with and receive orders from. Sector Forces can also provide a base of operations from which to stage missions.
If a group of heroes wants to start and command their own Rebel operation, integrating it with the local Sector Force gives them a ready-made organization. Even alternative command structures- such as a local royal tradition created by the Gamemaster- can be accommodated, since a Sector Force is allowed to retain its own internal structure. Remember that while Alliance High Command controls overall strategy, Sector Forces are responsible for taking the battle to the enemy every day.
SpecForces[]
Alliance Special Forces units are relatively few in number, but their high degree of training and personal investment make them effective combatants. SpecForce units are supremely confident in their own abilities, an opinion shared by Alliance High Command. They serve aboard the ships of the fleet, protect the main Rebel base (As on Hoth), train Sector Forces, carry out major commando operations, and fulfill any mission thrown at them by Alliance High Command.
SpecForce units use a formal organization similar to that of regular army units. However, they normally carry out missions as task forces or assigned assets regardless of formal classification or position in the command structure. SpecForce units are highly mobile and able to respond to emergency deployments throughout the galaxy.
- Fire Team (2-4 Troopers): The basic tactical unit, supervised by a senior trooper.
- Squad (5-15 Troopers): The Squad is the smallest functional unit, made up of a specific SpecForce soldier type, occasionally reinforced by complementary Fire Teams in a supporting role. They are designated by a color of their own choosing.
- Platoon (20-60 Troopers): A Platoon, designated by number, is composed of four Squads. It is commanded by a lieutenant or senior lieutenant. A Platoon can be deployed as a task force operating independently of or attached to other commands.
- Company (100-300 Troopers; plus support personnel): A Company, designated by letter, is a task force under the command of a captain or major. Companies typically consist of five Platoons, each of a particular type of SpecForce soldier.
- Regiment (300-1,800 Troopers; plus support personnel): Regiments divide the SpecForces into their specific environmental combat roles (See below). They are rarely fielded as a unit, but when they are, it is typically as a task force of 3-6 Companies, made up of the type of troops required for the mission. When deployed, a colonel or major commands them.
- Division (2,400-15,000 Troopers; plus support personnel): There are ten SpecForce divisions. The Command Division is attached to Alliance High Command, divided between the main base and the fleet, and is under the direct control of General Crix Madine. Five Divisions are assigned on an ongoing, as-needed basis to various Sector Commands, but they answer to their own generals. The remaining Divisions are deployed as needed in smaller formations to virtually any Rebel Alliance command that requires their specialized abilities. They answer to local commanders for the duration of the mission.
SpecForce Regiments[]
For training and administrative purposes, each soldier is considered part of a Regiment associated with the type of combat he or she is trained in. This combat type is usually, but not always, associated with a specific combat environment. These specialists are typically assembled into task forces with a wide variety of skills and combat abilities. See Alliance Military Ranks, above, for SpecForce ranks.
- 1st Regiment, Marines (SpaceOps): Specialize in shipboard combat, boarding actions, and security.
- 2nd Regiment, Pathfinders: The first in, Pathfinders drop covertly into a combat zone to perform reconnaissance, establish beachheads, and perform scouting missions for other units.
- 3rd Regiment, Urban Guerrillas: The urban-combat specialists, experts in fighting both within the smallest metropolitan areas and in the vast metal canyons of the galaxy's planet-cities.
- 4th Regiment, Wilderness Fighters: Wilderness Fighters receive generalized survival training and then specialize in a specific wilderness type, such as arctic, forest, or desert.
- 5th Regiment, Infiltrators: Masters of stealth and infiltration of enemy positions, these soldiers specialize in disrupting the enemy from within their own lines, using sabotage, social engineering, and silent death.
- 6th Regiment, Heavy Weapons Specialists: These SpecForces are gunners trained to use just about every type of Heavy Weapon available to the Alliance, including Heavy Repeating Blasters, Weapon Emplacements, Weapon Systems, and the massive Turbolasers aboard the ships of the fleet.
- 7th Regiment, Technicians: All other SpecForce specialists fall into this category. This includes actual technical equipment specialists as well as mechanics, drivers, pilots, systems operators, interrogators, and procurement specialists.
Using SpecForces[]
Adventures and campaigns centering on Special Forces are naturally more militaristic in nature than other types of adventures. Fortunately, the system of integrating multiple types of SpecForce soldiers into a single combat unit allows for a great diversity in character types at the gaming table. The task-force system allows Gamemasters to move the players' unit around the galaxy as required for the story.
When using SpecForces, the Gamemaster can emphasize the military aspects and details of the organization, as well as the higher degree of risk that the characters' missions entail. Adventures can be designed around the heroes' specific SpecForce character types. The heroes' selection of and limitations in using weaponry and equipment should also play a bigger role in specific missions.
Special Operations[]
Special Operations groups are made up of individuals who have shown great personal initiative, wide-ranging skills, and spectacular success at achieving Alliance goals in the most dire situations. Most Special Ops members are considered troublemakers or misfits by standard Alliance commands, but they are dedicated individuals who are able to take on challenges anywhere in the galaxy. The Chief of Special Operations reports directly to Alliance High Command, but must coordinate with the other Alliance commands for supplies and equipment. Those commands' willingness to support a Special Ops team is directly related to the priority of the mission, the team's reputation, and how hard Alliance High Command leans on it.
Special Operations mission groups receive their orders from the chief, delivered through the local Alliance command structure. Depending on the task at hand, a mission group might fall under the operational control of a local commander, group, or agent; or the mission group might be granted autonomy. Mission groups are typically small- usually 5-10 members- and have their own transportation. Missions might be covert (Such as breaking key figures out of Imperial prisons) or intentionally conspicuous (Such as blowing up a Star Destroyer in orbit around a planet occupied by Imperial forces). There are a few self-sustaining, autonomous Special Operations Teams that essentially fight the Empire on their own terms and respond to Alliance requests for aid when and as they see fit.
Alliance Operatives[]
Even though the Alliance Military is formidable in limited operations, it lacks the strength to fully engage Imperial forces in a sustained campaign. Throughout the galaxy, individual Alliance agents, or operatives, work in conjunction with Cell Networks and Alliance Military elements to engage the Empire on a daily basis. These are the Rebellion's spies, propagandists, recruiters, scroungers, and aid workers. They sow the seeds of rebellion on Imperial planets throughout the galaxy. Alliance Operatives are always outgunned, always outnumbered, and usually working in complete isolation.
Many heroes in this era act as highly autonomous Alliance Operatives. Agents can be attached to various parts of the Alliance structure. Rebel field agents work for Alliance Intelligence on semiautonomous, long-term missions. Other agents work for local resistance groups, perhaps attached to the local Sector Force or reporting through a Cell Network. Scroungers and procurement specialists work for local forces or for one of the Alliance High Command's ministries. They receive orders through other agents or through an attached military command. Agents must be able to adapt to constantly changing conditions and goals.
Agent security is paramount, because discovery means almost certain arrest, internment, and interrogation by Imperial officials. Agents also run the risk of Imperial reprisal against the local citizenry if an operative's actions attract notice.
Cell Networks[]
On worlds under Imperial control, Rebel Cell Networks provide citizens with the means to clandestinely strike back at the Empire. Cell Networks are essentially intelligence-gathering tools, providing a means of transmitting information to Alliance Intelligence while protecting the entire network in case of detection.
Cells are composed of three or four individuals, each of whom knows his or her own cell members plus one individual from another cell. Information and orders are passed to and from the local area coordinator through the network of cells. Area coordinators implement plans to carry out the orders of the network leader. The network leader- typically one per world- reports to off-world case officers located in the local Sector Force headquarters. Case officers work directly with Alliance Intelligence, providing information obtained by the network and receiving orders for new operations. Networks are designed to sustain the loss of multiple cells, and even of an area coordinator, with limited damage. However, heavily compromised networks must sometimes disband and reconstitute with a new structure.
Cell Bases[]
Alliance bases and outposts are the Rebellion's intelligence and communications centers. They provide safe havens for training, meetings, medical treatment, and repair facilities. The size and structure of these bases vary greatly, and they are normally camouflaged within the surrounding environment. The main Rebel base houses Alliance High Command, when it is not aboard the fleet. Alliance High Command is guarded by the best SpecForce units and Starfighter Wings, and its location is a closely guarded secret.
However, the vast majority of bases and outposts are small and unassuming, to minimize detection. Hidden rooms, small caves, or abandoned wrecks serve as meeting places for Alliance Cells. Individual apartments or permanently grounded Starships can become safe houses or weapons caches. Large hidden caches of weapons and material become supply bases for local groups.
Sector Forces, Allied Commands, and major resistance groups typically use large bases as their command centers. These bases have Starship and Vehicle hangars and repair facilities, sensor arrays, communications relays, and limited defenses. They also provide advanced training facilities and living quarters for a large number of personnel. A few large bases house small-scale manufacturing facilities for Alliance Starfighters.
Starfighter bases provide forward outposts from which Starfighter attacks can be directed. A typical Starfighter base is little more than a hangar, a command center, and living quarters.
Sectors in Rebellion[]
With resistance efforts spread across a multitude of sectors in the galaxy, judging the reach and strength of Rebel Alliance forces is difficult. Below is a partial list of sectors in which Rebel activity takes place during the time between the signing of the Corellian Treaty and the Battle of Endor. The amount and type of resistance varies greatly among sectors, and many offer only minimal resistance until well after the Battle of Yavin. Rebel activity increases significantly after the Alliance evacuation from Hoth and in preparation for the Battle of Endor. After Endor, as the Alliance transforms into The New Republic, many of these sectors are among the first to throw off their Imperial oppressors.
| Ado | Calamari | Elrood | Kira | Oplovis | Rolion |
| Airam | Carrion | Farstay | Lambda | Ottega | Sumitra |
| Anoat | Churba | Hollan D1 | Lifh | Parmel | Tapani |
| Atrivis | Churba | Homon | Maldrood | Parmorak | Tharin |
| Bormea | Churnis | Irnaj | Merel | Ploo | Trans-Nebular |
| Brak | Corellian | Kalamith | Moddell | Rayter | Trax |
| Bruanii | Eclorar | ||||
Alliance Personnel[]
See also: Rebel Nonheroic Units
Below are several types of Rebel Alliance members. They are shown here as Human, but members of the Rebellion can be of any known Species; their game statistics should be adjusted accordingly.
| NAME | CHALLENGE LEVEL | DESCRIPTION |
|---|---|---|
| Rebel Cell Member | CL 0 | The primary Alliance assets on Imperial worlds, taking careful note of Imperial actions. |
| Rebel Honor Guard | CL 5 | Ceremonial guards for formal occasions, frequently rotated with standard units to prevent elitism. |
| Rebel Marksman | CL 4 | Skilled sharpshooters, integrated with standard Rebel units for greater versatility. |
| Resistance Leader | CL 5 | Local resistance coordinators, tasked with disrupted planetary Imperial forces. |
| Rogue Squadron Pilot | CL 8 | A pilot of the legendary squadron, the best of the best pilots available. |
| SpecForce Urban Guerrilla | CL 5 | Urban-combat specialists, proficient in close-combat assaults and demolitions. |
| SpecForce Infiltrator | CL 7 | Shadowy operatives, known not just for their abilities, but their vengeful attitudes. |
| SpecForce Marine | CL 4 | Fleet personnel, trained in small arms for boarding actions. |
| SpecForce Officer | CL 7 | Experienced members of SpecForces, leading by example with their specialized training. |
Alliance Personalities[]
See also: Rebel Heroic Units
The Rebel Alliance has many unique leaders and influential personnel. These personalities can be used as commanding officers or as support for the heroes.
| NAME | CHALLENGE LEVEL | DESCRIPTION |
|---|---|---|
| Admiral Ackbar | CL 11 | Admiral of the Rebel fleet, coordinating major fleet actions for much of the Rebellion. |
| Wedge Antilles | CL 9 | A legendary pilot, the only one to combat both Death Stars. |
| Tycho Celchu | CL 8 | An Alderaanian Imperial. Joins the Rebellion and later Rogue Squadron after the destruction of his home. |
| Airen Cracken, General | CL 10 | A major pillar of support within the Rebellion, eventually rising to head Alliance Intelligence. |
| Nera Dantels | CL 5 | A smuggler that aids the Alliance following the Battle of Yavin. One of the first B-Wing pilots. |
| Biggs Darklighter | CL 4 | A Tatooine native, and close friend of Luke Skywalker, who sacrifices himself to destroy The Death Star. |
| Wes Janson | CL 8 | The wingman of Wedge Antilles, and Rogue 6 of the elite Rogue Squadron. |
| Derek "Hobbie" Klivian | CL 8 | An Imperial defector, known for his many legendary deaths, none of which seemed to stick. |
| Nien Nunb | CL 8 | A well-known Rebel hero, famous for his resistance group in the Sullust System. |
| Carlist Rieekan, General | CL 12 | A logistical expert, charged with the new Alliance main base on Hoth. |
| Deena Shan | CL 5 | An Alliance operative infiltrating the ranks of Imperial officers. |
| Wicket | CL 3 | An Ewok forever critical to the alliance between the Bright Tree Village and the Rebels. |
| Winter | CL 3 | An Alliance agents known as the "Targeter," using her perfect memory to map out locations and dossiers. |
Technology and Vehicles[]
The Rebel Alliance tries to standardize Starships and Weapon Systems when possible, but as a network of semi-independent commands, the Alliance must press into service any available weapon, Vehicle, or Starship. With a few exceptions, such as the Mon Calamari Shipyards, The Rebel Alliance is unable to manufacture its own Equipment, Vehicles, technology, and other gear. However, it acquires material from across the galaxy through scrounging, donations, purchases, and other methods. The items described here are among those used by Rebel forces.
Cracken's Rebel Field Guide[]
Main Article: Cracken's Rebel Field Guide
General Airen Cracken and his infamous Cracken's Crew excel at adapting equipment for sabotage or other disruptive purposes. Cracken and his crew members carry out extensive sabotage and clandestine attacks against the Empire, and they also train other units in their best tricks. Cracken's encrypted Rebel Field Guide can be found at most Rebel bases and training facilities. Not all of Cracken's tactics are destructive. As Cracken likes to point out, sometimes disabling a mechanism is more effective than destroying it, especially if you hope to use it later or if you need to prevent collateral damage. The creative use of mundane items is another of his specialties. Cracken's more popular tactics are described here.
Weapon Emplacements[]
See also: Weapon Emplacements
The Rebel Alliance relies on artillery emplacements to bolster the defenses of major bases and outposts. Fixed emplacements take time to install, and only permanent bases or those most in need of defense are granted this scarce resource. Weapon Emplacements are treated as Vehicles for statistical purposes, but they are usually immobile and do not require a Pilot to function. Instead, Gunners control all the functions of a Weapon Emplacement.
| WEAPON EMPLACEMENT | TYPE | CHALLENGE LEVEL | IMAGE |
|---|---|---|---|
| 1.4 FD P-Tower | Antivehicle | CL 5 |  |
| DF.9 Anti-Infantry Battery | Antipersonnel | CL 5 | 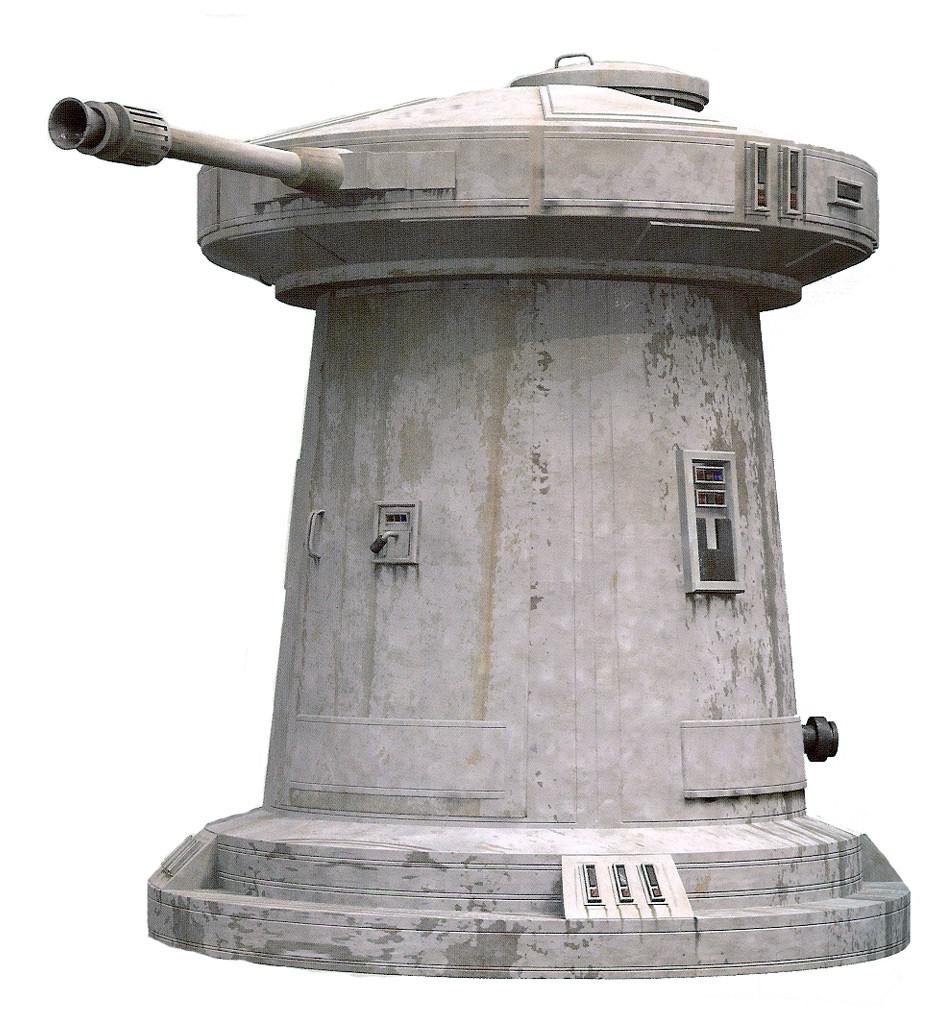 |
| FPC 6.7 Anti-Aircraft Battery | Antivehicle | CL 5 |  |
| v-150 Planet Defender | Antivehicle | CL 12 |   |
Combat Assault Vehicles[]
Combat Assault Vehicles- CAVs- are armored repulsorlift craft designed or modified to carry medium to heavy weapons during direct assaults and other combat missions. Rebel CAVs range from fast speeders to heavily armored weapons platforms. The Rebel Alliance has a variety of models in its arsenal, but it has few in large numbers, and these models were not top-of-the-line designs even when originally sold. Most have been further modified by the Alliance, as they often were by their previous owners. Below are some of the more common models available.
Speeders[]
See also: Speeders
| SPEEDER | CHALLENGE LEVEL | SIZE | IMAGE |
|---|---|---|---|
| HTT-26 Heavy Troop Transport | CL 8 | Gargantuan | 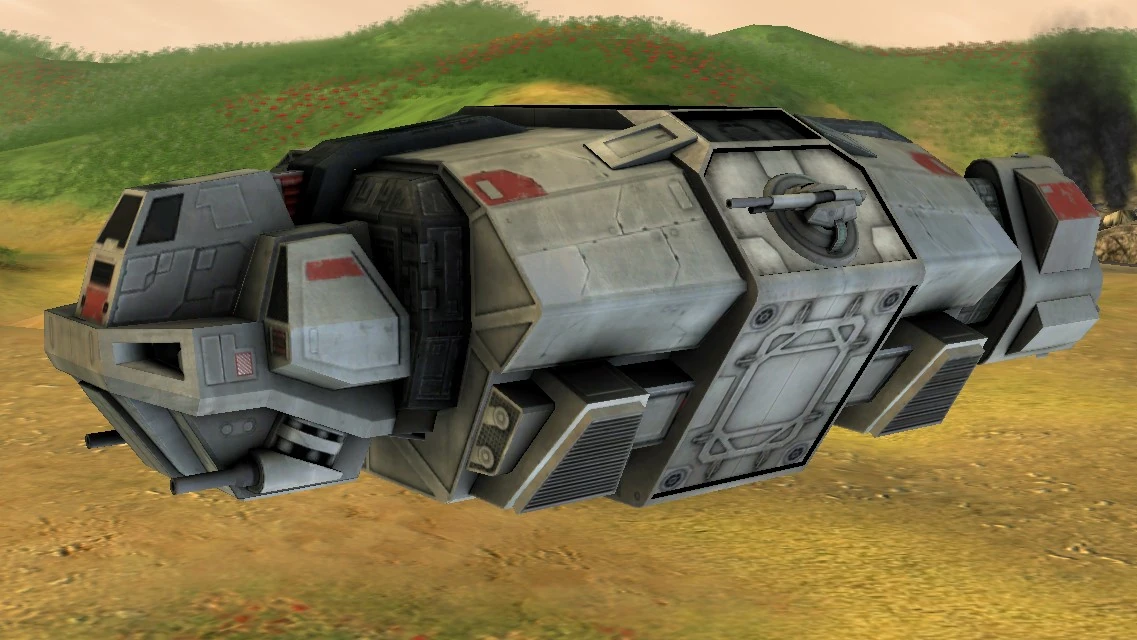  |
| Mekuun Heavy Tracker | CL 8 | Colossal | 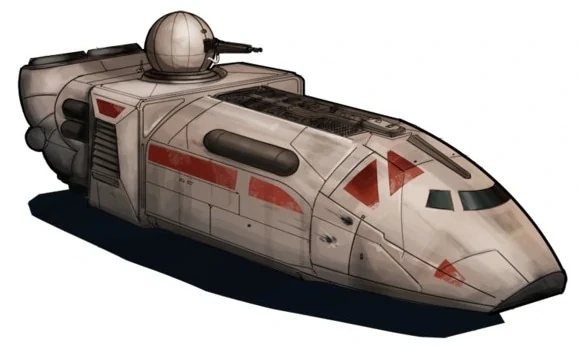  |
| T2-B Repulsor Tank | CL 7 | Huge | 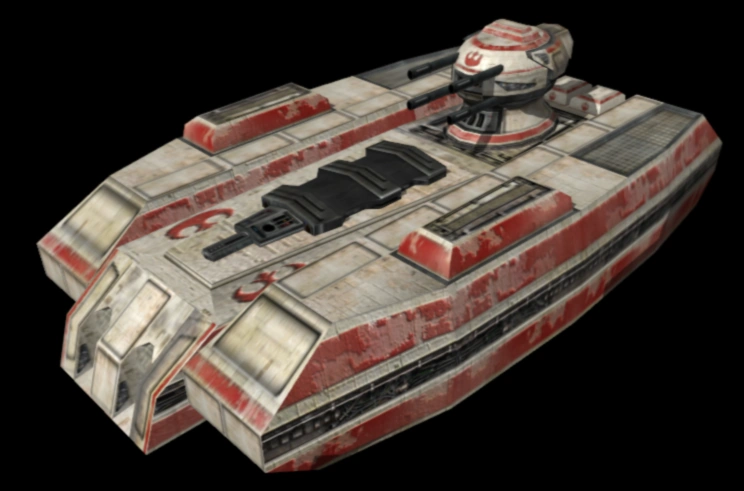 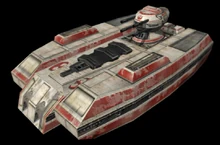 |
| U-LAV | CL 5 | Huge |  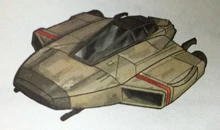 |
.jpg)
Tracked Vehicles[]
See also: Tracked Vehicles
| TRACKED VEHICLE | CHALLENGE LEVEL | SIZE | IMAGE |
|---|---|---|---|
| MPTL-2a Mobile Proton Torpedo Launcher | CL 8 | Gargantuan | 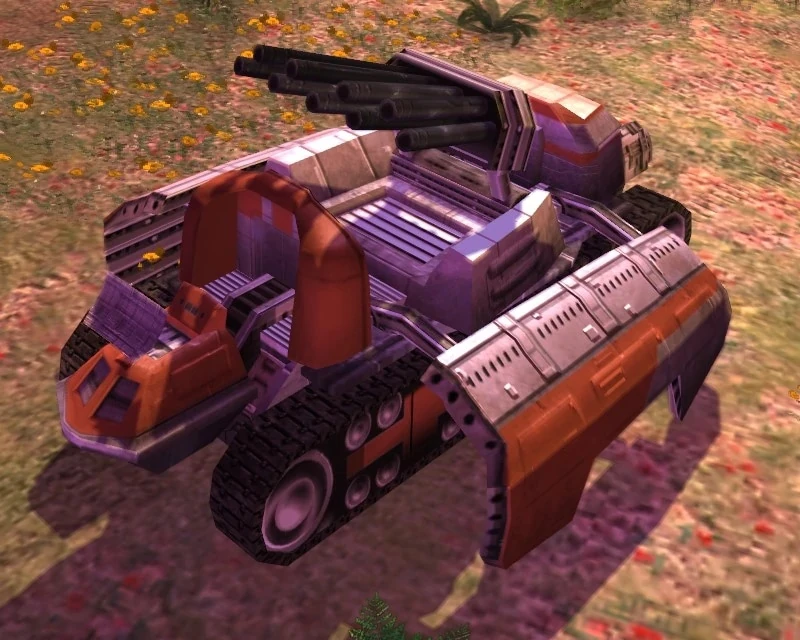  |
| T4-B Heavy Tank | CL 12 | Gargantuan | 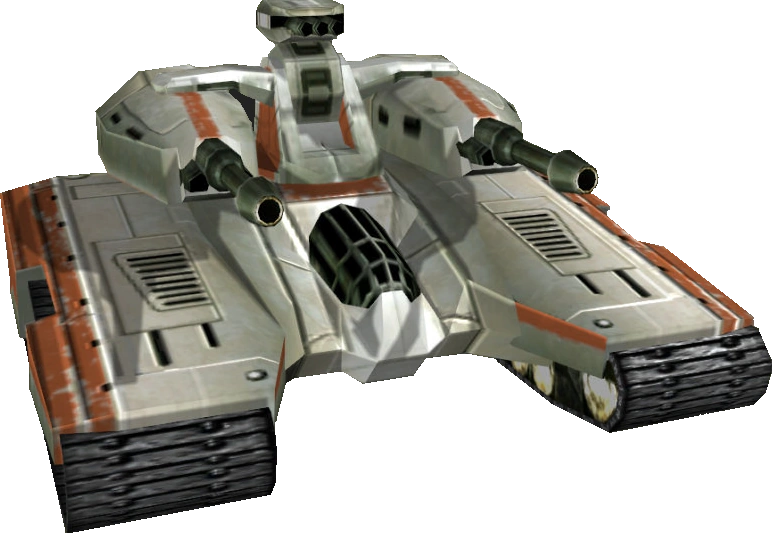 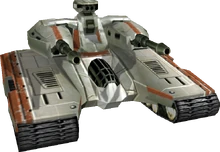 |
.jpg)
Starships[]
Most of The Rebel Alliance's primary ships are covered in the Saga Edition Core Rulebook and in Starships of the Galaxy. However, the Rebels use a great variety of Starships, and any available craft might be pressed into service, especially when needed to fill a specific role. A few additional Alliance ships are included here.
Starfighters[]
See also: Starfighters
| STARFIGHTER | CHALLENGE LEVEL | SIZE | IMAGE |
|---|---|---|---|
| T-Wing Interceptor | CL 8 | Huge | 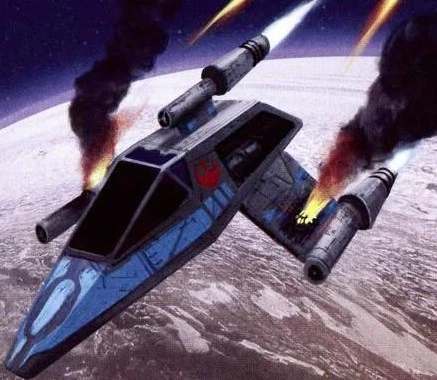  |
Space Transports[]
See also: Space Transports
| SPACE TRANSPORT | CHALLENGE LEVEL | SIZE | IMAGE |
|---|---|---|---|
| Corellian YM-2800 Limpet Ship | CL 7 | Colossal |   |
| X4 Gunship | CL 10 | Colossal | 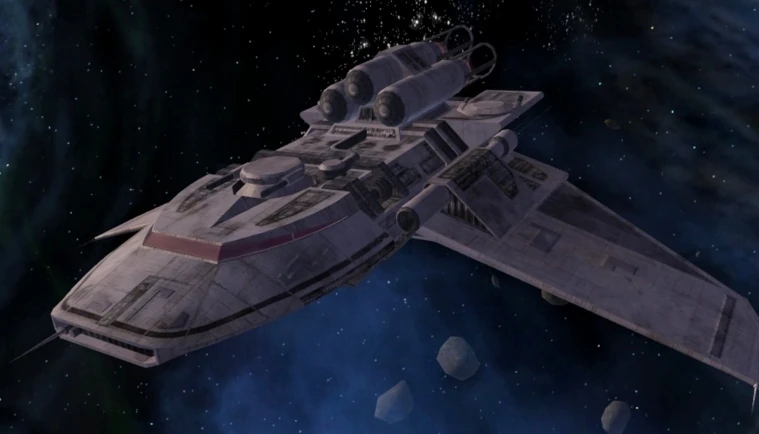 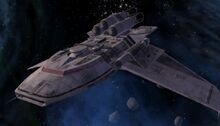 |